
Let’s face it, the Lexus GX470 wasn’t built for mall crawling, even though that’s what many owners of these vehicles do with them. The first generation Lexus GX470 especially is more rough-and-rugged than the refined newer models, so it craves dirt roads, mountain passes, and the freedom of the open trail.
However, with 220,000 miles on the clock like our Project GX470 here, even the mightiest of the first gen GX470 (aka Land Cruiser Prado 120) can succumb to high mileage wear and tear. When you drive bumpy trails (or speedbumps at Starbucks), if you hear clunking over bumps, it might be a telltale signal that your lower control arm (LCA) bushings need replacing.

My GX470 had started making the familiar suspension clunk over bumps, which pointed directly to worn front lower control arm bushings. With the GX already serving as a project vehicle, it made sense to tackle the repair before the problem worsened.
The Lexus GX 470 shares much of its engineering with the global Land Cruiser Prado platform, which explains its reputation for durability and off-road capability.
GX470 Platform Quick Specs
- Engine: 4.7L V8 2UZ-FE
- Horsepower: 263 hp
- Torque: 323 lb-ft
- Drivetrain: Full-time 4WD
- Production years: 2003–2009
- Platform: Toyota Land Cruiser Prado 120
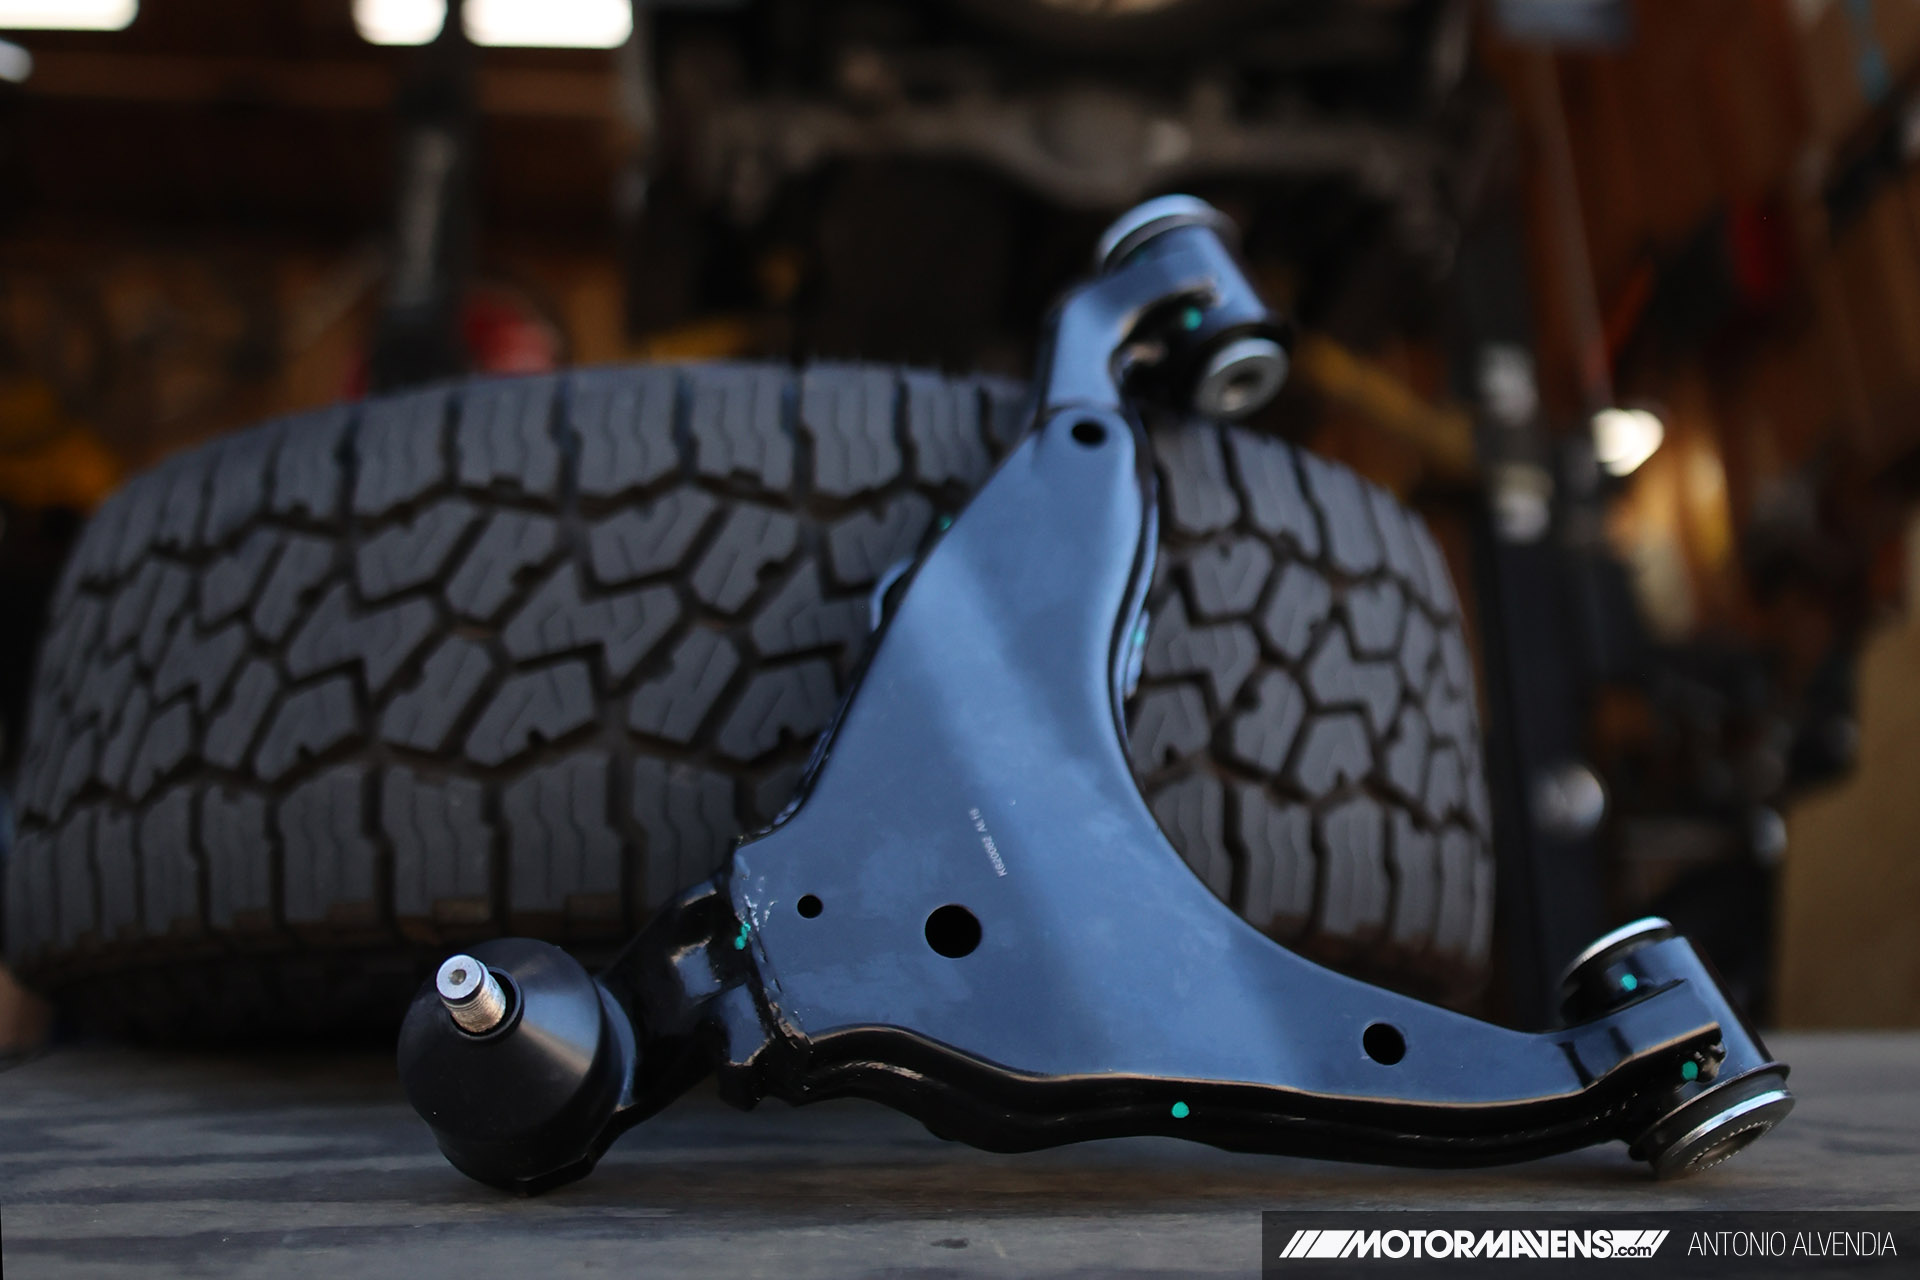
When searching the internet for front LCA replacements, it seemed that most people just opt to swap out the entire control arm assemblies, since it’s a bit easier to do than pressing bushings in and out. I found a good deal on Front Lower Control Arms on CarParts.com, so I ordered them and they arrived at my doorstep in just a few days.
I normally use OEM Toyota parts for everything, but I decided to get these FLCAs from CarParts.com because they were much much less expensive than buying OEM Lexus ones at the Lexus dealership.
Since I am just in the beginning stages of my GX build, I still have a ton of things to spend money on, and I couldn’t prioritize some crazy aftermarket control arms at the start. Since I bought my GX470 used from a low-end car dealer that didn’t have its service history, I knew I had to immediately replace the timing belt and water pump just to stay on the safe side. Also, the shocks, brakes, headlights, and tires were worn out – these are all things I wanted to knock out ASAP to improve drivability of the GX.
I knew that when I really begin going off-roading often with the GX, I would probably want to replace the Front Lower Control Arms (FLCAs) with aftermarket ones later. So, these stock replacement FLCAs I got from CarParts.com are a perfect choice for now.
What Causes GX470 Lower Control Arm Failure?
The most common cause of lower control arm problems on the GX470 is bushing wear. Over time the rubber bushings crack and soften, allowing excess movement in the suspension.
Typical symptoms include:
-
Clunking noise when hitting bumps
-
Loose steering feel
-
Uneven tire wear
-
Vibration through the steering wheel
Many GX470 owners begin noticing these issues after 150,000 miles or more.
Why Replace the Control Arms?
The long-term plan for this GX470 includes upgrading the suspension with aftermarket components designed for more aggressive off-road use.
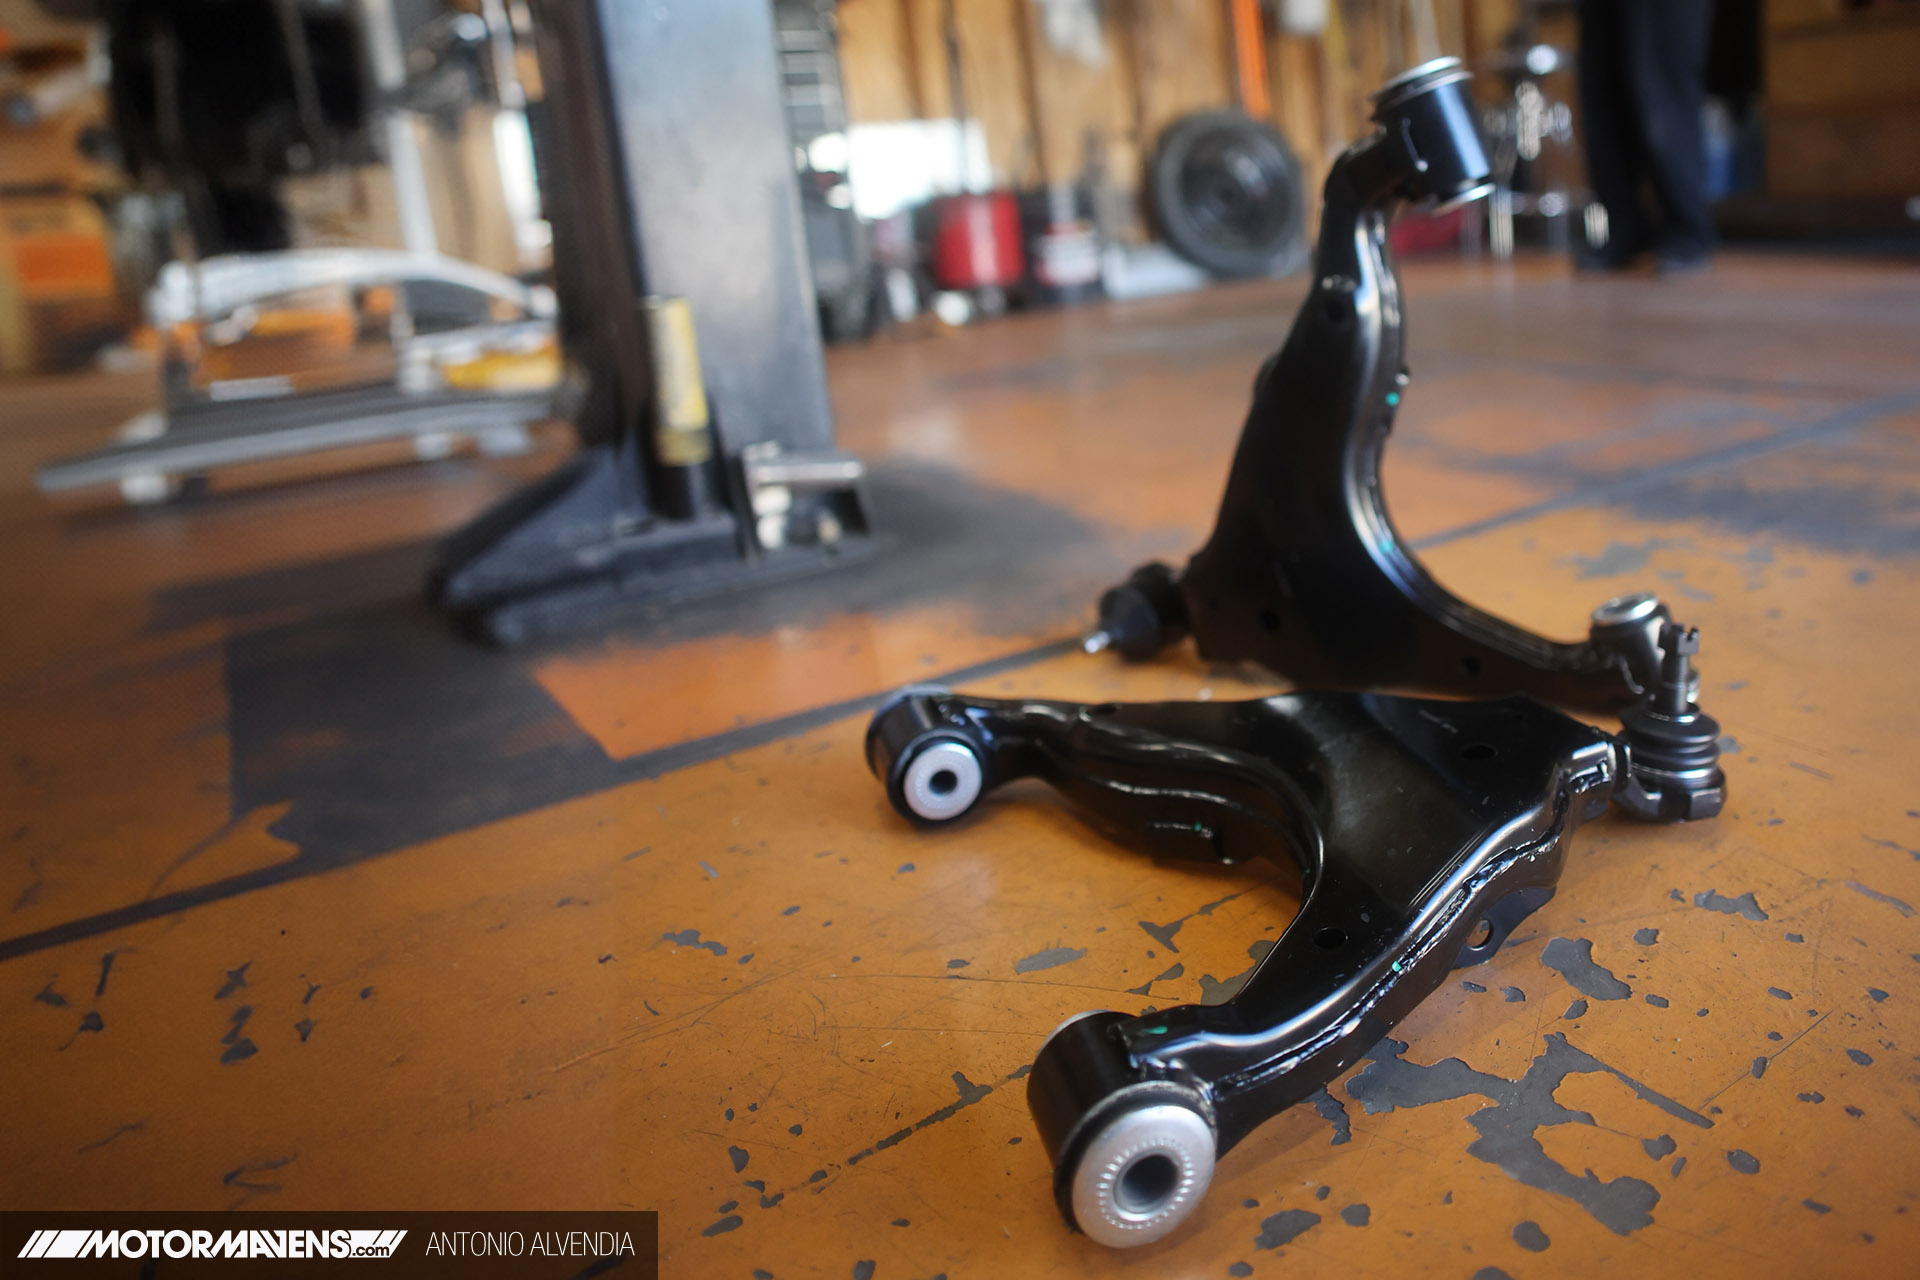
For now, installing stock replacement lower control arms made the most sense. Pre-assembled units already include the bushings and ball joints, which simplifies the job and restores factory ride quality.
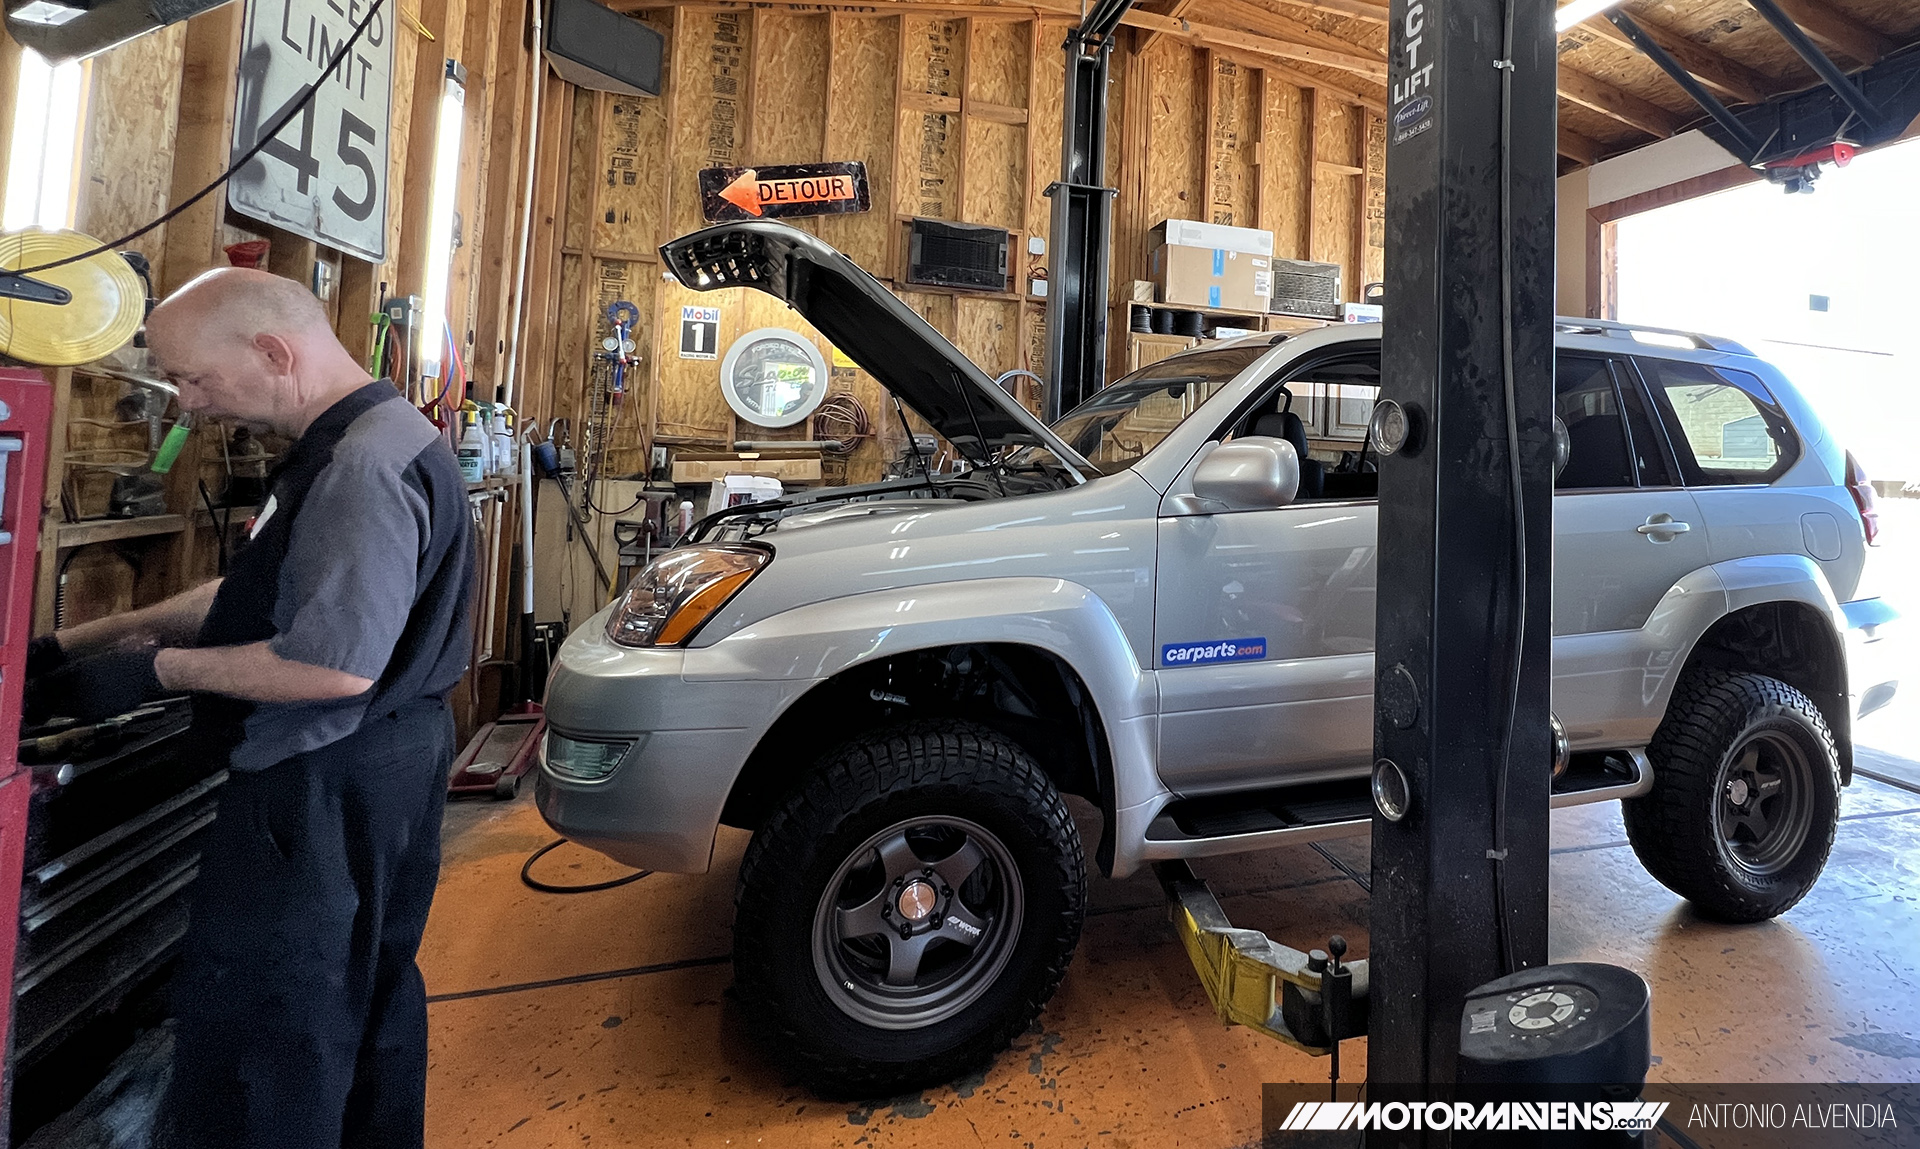
Since I was filming the install for a YouTube video, I asked my friend Nate to help me install these FLCAs using the lift at his home garage. A lift makes the job easier, although the repair can still be done at home with jack stands.
The GX470 is refreshingly straightforward to work on. Toyota engineering from this era tends to favor durability and serviceability over unnecessary complexity.
However, if you own a Lexus GX, some tools, and need to replace your FLCAs, you can still replace them at home without a lift. If you don’t mind putting in a little elbow grease, you can use this guide to restore your GX’s composure and get back to conquering the wild.
Tools & Supplies Needed:
- Jack and jack stands
- Socket wrench set (metric)
- Torque wrench
- Ball joint separator
- Hammer
- Pry bar
- Replacement lower control arms (pre-assembled with ball joints is recommended)
- Anti-seize lubricant
- New cotter pins
Step 1: Prep the Beast
Park your GX on level ground and engage the parking brake. Chock the wheels for good measure. Loosen the lug nuts on the front wheels before jacking up the vehicle. Lift the vehicle using the manufacturer designated jack points (consult your owner’s manual if you don’t know where they are) and carefully raise the front end, placing jack stands securely under the frame rails.
Step 2: Remove the Front Wheels
Remove the front wheels and set them aside. Now, the fun (and slightly technical) part begins. Identify the lower control arm – it’s the beefy metal component connecting the wheel hub to the frame. Locate the two bolts securing the control arm to the frame and remove them using your socket wrench (you might want to use an impact gun or a long extension for more leverage). Remember, lefty-loosey! Next, tackle the ball joint. This is where a ball joint separator tool comes in handy. Compress the spring using the tool according to the instructions, then pry the ball joint loose from the knuckle with a strategic hammer strike. Repeat on the other side.
Step 3: Remove the Old Control Arm
With the ball joints separated, the control arm should be free. Remove it carefully, noting the position of the bushings and any spacers for accurate reassembly later. Now, closely inspect the old control arm for cracks, bends, or worn bushings. If you see any signs of damage, replacing both sides is highly recommended.
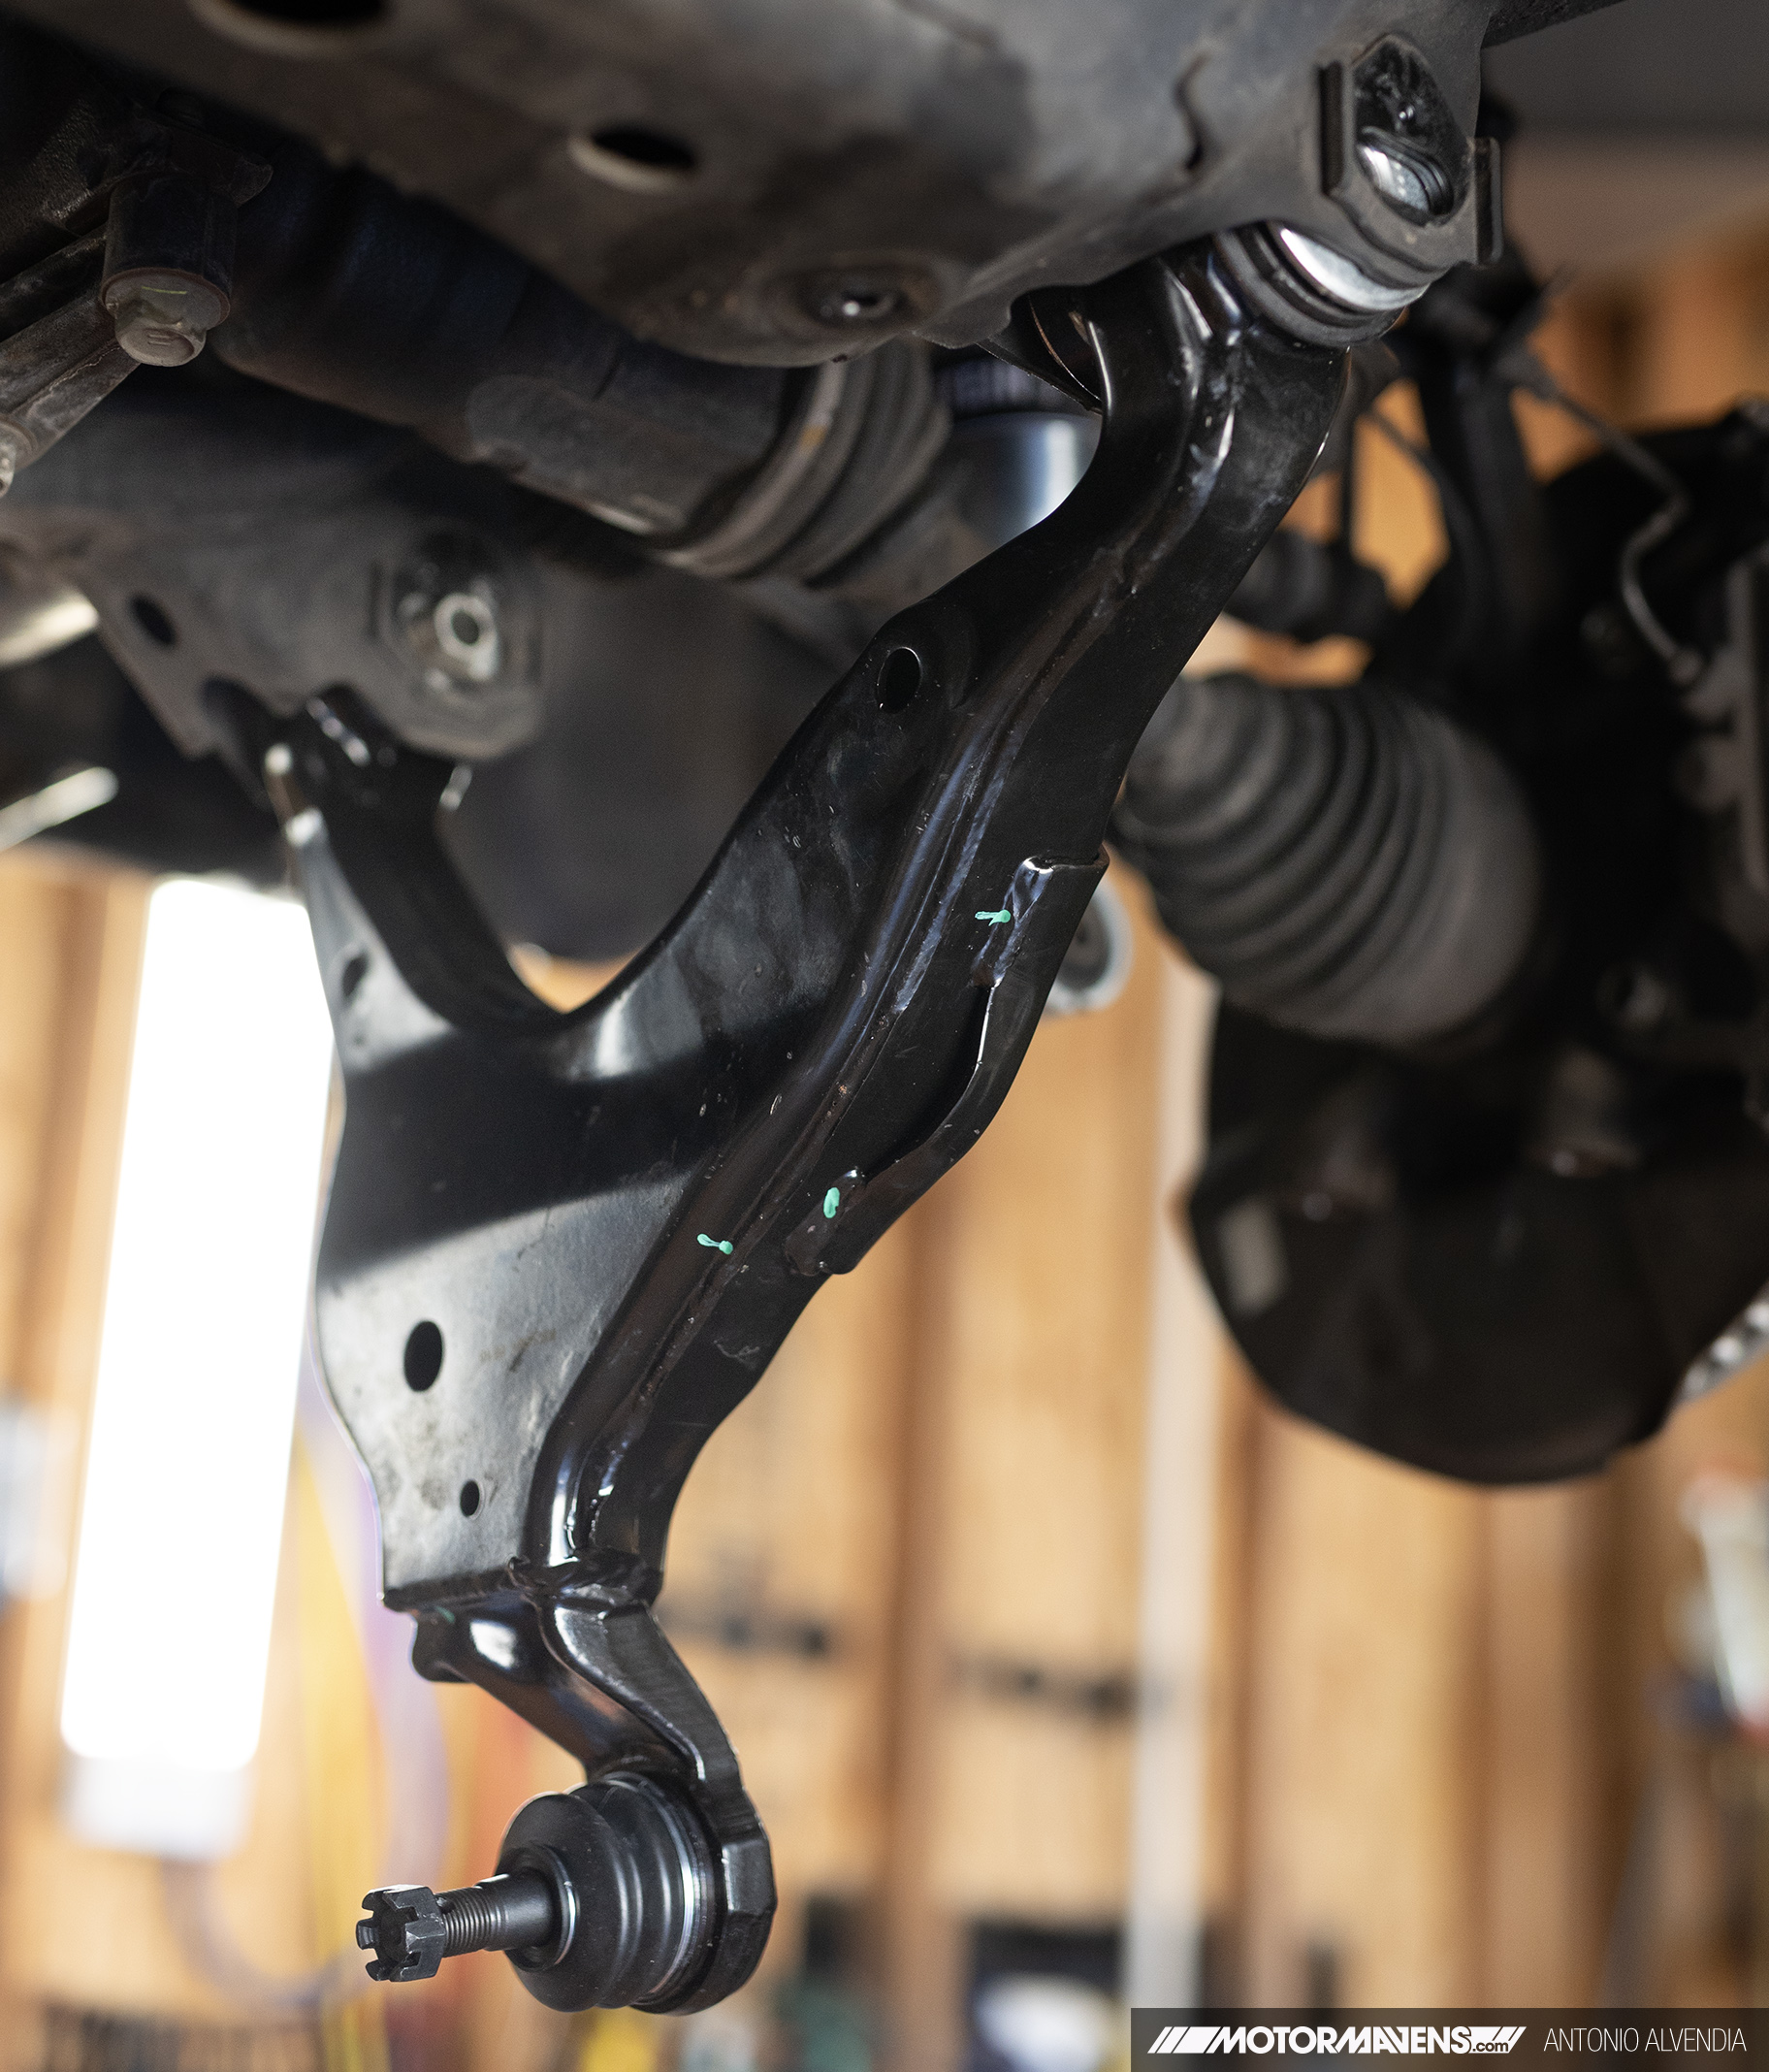
Step 4: Install New Control Arm
Time for the new one! Slide the new control arm into position, ensuring proper alignment of the bushings and spacers. Remember that anti-seize lubricant on the bolts is your friend here – it prevents future seizing and makes future wrenching easier. Hand-tighten the frame bolts first, followed by the ball joint bolt. Don’t forget to replace the cotter pin with a new one.
Step 5: Reassembly
Repeat steps 2-4 on the opposite side. Now, with both new control arms in place, snug up all the bolts to the specified torque using your torque wrench. Refer to your repair manual for the exact torque values. Double-check everything, then lower the GX and tighten the lug nuts to the proper torque.

Final Step: Road Test
Once everything is back together, take the GX for a short test drive and listen carefully for any clunks or unusual noises. If everything sounds smooth, the job is done and your suspension should feel noticeably tighter. A proper wheel alignment is highly recommended after replacing control arms, since removing suspension components can easily knock the alignment out of spec. Getting the truck aligned will ensure good handling and prevent uneven tire wear.
While you are working in this area, it is also a good opportunity to inspect a few other suspension components that commonly wear out over time. Parts like sway bar end links, sway bar bushings, and tie rod ends are easy to check while the front end is already apart. Replacing worn components now can save time later and help eliminate the clunks and looseness that older GX470s sometimes develop.
So, there you have it. With some determination and this guide, you’ve tackled a common GX ailment and kept your adventure companion ready to explore. Now, get out there and discover new territories – your GX is ready to rock!
:: Antonio Alvendia
Instagram: @AntonioSureshot • @MOTORMAVENS
www.antoniosureshot.com
MotorMavens on Facebook
MotorMavens on YouTube


Pingback : PROJECT CAR> Lexus GX470 Is Civilized For Overland and Offroad | MotorMavens • Car Culture & Photography